Kinemaster Green Apk Download
Everything You Need to Know About KineMaster Green Screen
Master KineMaster green screen: Step-by-step chroma key guide, troubleshooting, tips for stunning visuals & creative effects!
How to Use KineMaster Green Screen (Quick Answer)
KineMaster green screen lets you replace a solid-colored background in your video with any image or video clip using a feature called Chroma Key.
Here is how to do it in 5 quick steps:
- Open KineMaster and start a new project
- Import your background image or video as the first layer
- Add your green screen clip as a layer on top
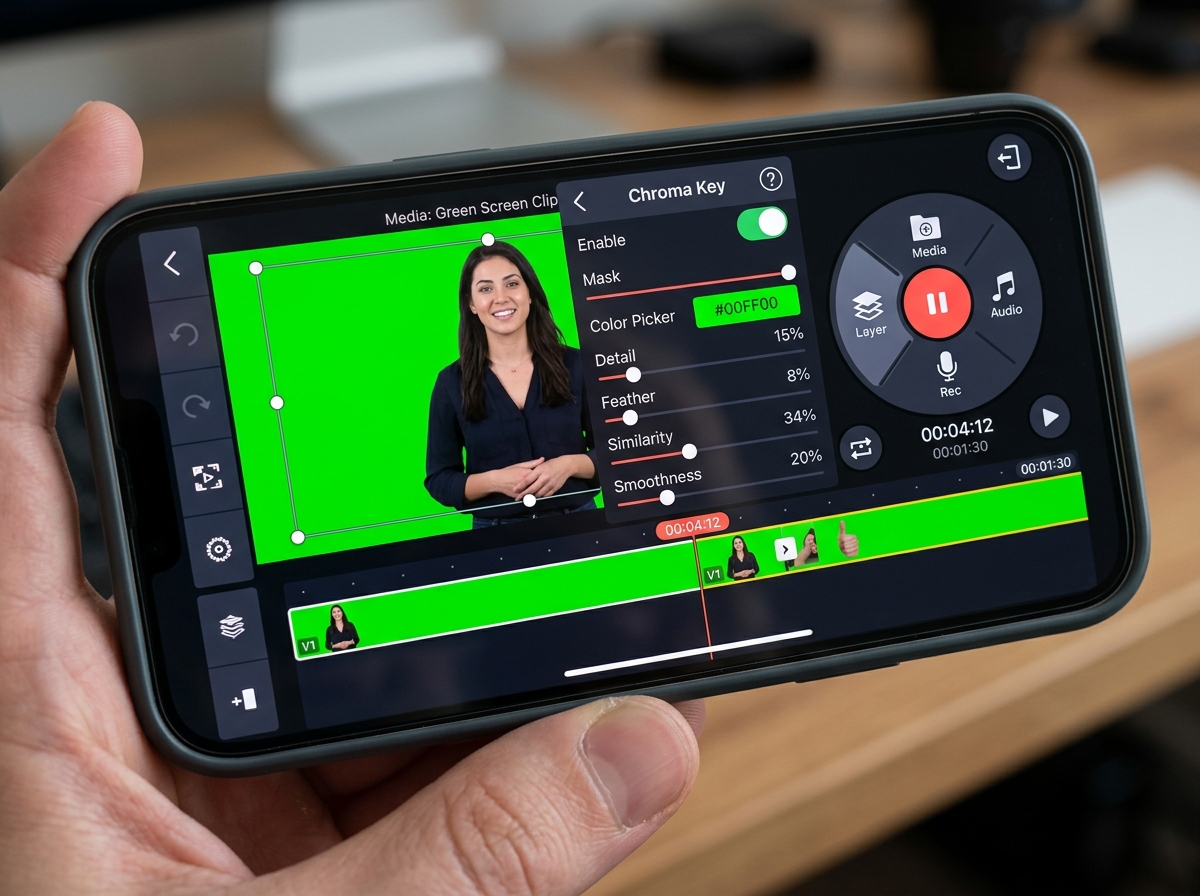
- Tap the Chroma Key option and use the color picker to select the green color
- Adjust the settings (strength, similarity, edge thickness) until the background disappears cleanly
That is the short version. The rest of this guide walks you through each step in detail, fixes common problems, and shows you how to get professional-looking results on your phone.
If you have ever watched a weather reporter standing in front of a moving storm map, or seen a YouTuber appearing to stand on the surface of Mars, you have already seen green screen technology in action. It is one of the most powerful tricks in video editing — and with over 700 million downloads, KineMaster has made it accessible to anyone with a smartphone.
But getting clean, professional results is not always as simple as tapping one button. Many beginners run into issues like fuzzy edges, a ghostly face effect, or a background that only partially disappears. This guide covers everything — from filming your footage correctly to fine-tuning every slider in KineMaster.
I’m Faisal Shahzad, and through my work at KineMaster APK I’ve helped thousands of mobile editors master the KineMaster green screen feature, from first-time creators to content producers building full video workflows on Android and iOS. Let’s walk through exactly how to make it work for you.

What is the KineMaster Green Screen Feature?
At its core, the kinemaster green screen feature is powered by something called “Chroma Key” technology. In film and television, chroma keying is the process of isolating a specific color (usually bright green or blue) and making it transparent. Once that color is gone, you can “see through” that layer to whatever is placed underneath it.
When we talk about Exploring KineMaster Green Screen: Unlocking Creative Possibilities, we are looking at a tool that allows for complex visual storytelling. It isn’t just about changing a background; it’s about background subtraction and digital compositing. By layering multiple videos, we can create scenes that would be impossible or too expensive to film in real life.
In KineMaster, this feature is incredibly intuitive. Instead of needing a massive desktop computer, our mobile devices can now handle high-resolution transparency in real-time. Whether you are using a standard green backdrop or a lime-colored wall, the app identifies that hue and subtracts it from the frame, leaving your subject perfectly isolated.
How Chroma Key Works in KineMaster
The magic happens through the “Alpha Channel.” When you enable Chroma Key, KineMaster creates a mask where the selected color becomes 0% opaque (invisible), and everything else remains 100% opaque.
To get started, you can find the app on the Google Play Store. Once installed, you use the Color Picker tool to tell the app exactly which shade of green you want to remove. Because lighting is never perfectly uniform, KineMaster doesn’t just look for one single hex code; it looks for a range of similar colors.
The real-time preview is our best friend here. As you move the sliders, you see the background vanish instantly. This immediate feedback allows us to layer subjects into virtual sets, historical locations, or even animated worlds with just a few taps.
Step-by-Step Guide to Using KineMaster Green Screen
Ready to dive in? Using the kinemaster green screen feature requires a specific order of operations. If you import your green screen clip first, you might find the Chroma Key option is grayed out. This is because Chroma Key only works on Layers, not on the primary Media track.
Follow these steps for a perfect setup:
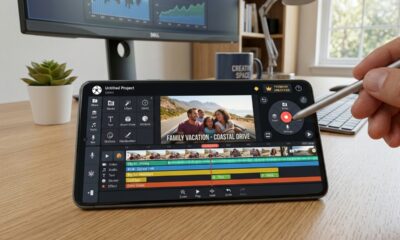
- Start a New Project: Open the app and select your desired aspect ratio (16:9 for YouTube, 9:16 for TikTok/Reels).
- Import the Foundational Layer: Tap on “Media” and select the image or video you want to appear as your new background. This goes on the main timeline.
- Add the Green Screen Layer: Move the playhead to where you want the effect to start. Tap “Layer,” then tap “Media.” Select your green screen footage.
- Position the Clip: Resize or move your green screen clip so it fits where you want it on the background.
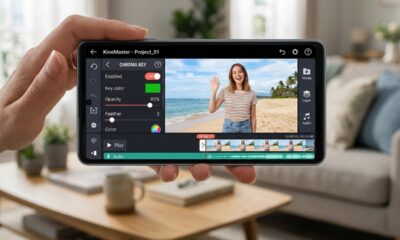
- Enable Chroma Key: With the green screen layer selected, a menu will appear on the right. Scroll down and tap “Chroma Key,” then toggle the “Enable” switch.
- Select the Key Color: Usually, KineMaster detects the green automatically. If it doesn’t, tap the “Key Color” box and use the picker to match the green of your footage.
For a deeper dive into these mechanics, check out our guide on Chroma Key in KineMaster: 13 Steps to Stunning Visuals.

Preparing Your Footage for the Best Kinemaster Green Screen Results
The secret to a “Hollywood” look isn’t actually in the app—it’s in how you film. Even the best software struggles with poorly lit footage. If you are downloading the app from the App Store to use on an iPhone, you already have a great camera; now you just need the right environment.
- Even Lighting is King: Shadows on your green screen are the enemy. They create different shades of green that the app might not recognize. Use at least two lights to wash the background evenly.
- Subject Distance: Have your subject stand at least 3 to 5 feet away from the green screen. This reduces “color spill” (where green light reflects onto the subject’s skin or hair).
- High Resolution: Always film in the highest resolution possible (4K or 1080p). More pixels mean cleaner edges for the Chroma Key tool to work with.
- Wrinkle-Free Backdrop: If you are using a cloth screen, steam out the wrinkles. Every fold creates a shadow that can lead to “noisy” or fuzzy backgrounds.
Fine-Tuning Your Kinemaster Green Screen Settings
Once you’ve enabled the effect, you might notice the edges look a bit jagged or the subject looks a bit “see-through.” This is where the fine-tuning sliders come in. You can use our Green Screen Maker: Create Stunning Effects in Seconds tips to master these controls:
- Similarity (Top Slider): This controls how much of the green range is removed. If your subject is disappearing, turn this down. If the background is still visible, turn it up.
- Smoothness/Strength (Bottom Slider): This blends the edges. It helps transition the subject into the new background so they don’t look like a cardboard cutout.
- Show Mask: This is a pro tip! Toggle “Show Mask” to see your video in black and white. Your subject should be solid white, and the background should be solid black. If there is gray in either area, keep adjusting.
- Detail Curve: This allows for very precise adjustments of the highlights and shadows within the keying process.
- Edge Feathering: This softens the very outer pixels of your subject, which is essential for making hair look natural against a new background.
Troubleshooting Common Green Screen Issues
Even with the best intentions, things can go wrong. We have all been there—you finish your edit only to realize your subject has a “fuzzy” halo or their face is partially transparent.
Here is a quick reference table to help you fix the most common kinemaster green screen headaches:
| Issue | Likely Cause | The Fix |
|---|---|---|
| Ghost Face | Subject has green eyes or is wearing green. | Change clothing; use the “Mask” tool to exclude the face from the key. |
| Fuzzy Edges | Poor lighting or low-resolution footage. | Increase “Similarity” and use “Edge Feathering” to soften the noise. |
| Color Spill | Green light reflecting onto the subject. | Adjust “Saturation” and “Hue” in the Adjustment menu to neutralize green tints. |
| Background Not Disappearing | Key Color mismatch. | Use the Color Picker to manually select the most prominent green in the frame. |
| Grayish/Noisy Background | Shadow on the physical screen. | Adjust the “Detail Curve” to crush the blacks in the background. |
If you are using an older device or an alternative browser to research assets, hardware limitations can sometimes cause the preview to lag. Don’t worry—the final export will usually be much smoother than the live preview.
Creative Applications for Your Edited Videos
The kinemaster green screen tool is more than just a gimmick; it is a gateway to professional-grade content. Because our KineMaster APK allows for 4K export and no watermarks, your final product will look like it was made in a professional studio.
- Travel Vlogs: Can’t afford a trip to Paris? Film yourself in front of a green screen and place yourself at the Eiffel Tower.
- Educational Tutorials: Teachers can stand “inside” a human cell or next to a chemical reaction to make lessons more engaging.
- Music Videos: Create trippy, psychedelic backgrounds that pulse with the music.
- Social Media Content: Use “Scan Green Screen” effects or trending VHS overlays to grab attention on Instagram and TikTok.
- Product Reviews: Place your product in a clean, minimalist virtual studio without actually building one.
Frequently Asked Questions about KineMaster Green Screen
Can I use green screen in the free version of KineMaster?
Yes, the Chroma Key feature is available in the free version. However, free users will have a KineMaster watermark on their exported videos. Additionally, some high-resolution export options and premium assets in the store might be locked. Many creators prefer using our version of the KineMaster APK to access these premium features and 4K export without the watermark.
Why is my green screen background not disappearing completely?
This is usually due to “Key Color Precision.” If your physical green screen has shadows (dark green) and bright spots (light green), the app might only pick up one shade. To fix this, use the “Similarity” slider to widen the range of green being removed, or improve your lighting to make the green more uniform.
What is the best color to use for chroma keying?
While “Green Screen” is the most common term, you can actually use any solid color. Green is preferred because digital camera sensors are most sensitive to green, leading to a cleaner “key.” Blue is the second most popular choice, often used if the subject has blonde hair (which can sometimes pick up green spill) or is wearing green clothing. Avoid colors that match human skin tones, like red or orange.
Conclusion
Mastering the kinemaster green screen feature is one of the fastest ways to elevate your video production from “amateur” to “professional.” By understanding how Chroma Key works, preparing your footage with even lighting, and taking the time to fine-tune your sliders, you can transport your audience anywhere in the world—or out of it.
At KineMaster APK, we believe that creative control should be in everyone’s hands. Our version of the app provides you with the professional tools you need, like 4K export and a completely watermark-free experience, so your creativity is never limited by a subscription.
Ready to start building your virtual world? Download the latest tools and templates at https://kinemasterappk.com/ and show us what you can create!


 Best Kinemaster MODs2 months ago
Kinemaster for Beginners: Your First Video in 15 Minutes (No Experience Needed)

 Kinemaster Black2 years ago
KineMaster Black Download Latest Version v8.5

 Red Kinemaster Download2 years ago
Red Kinemaster Download Apk Latest Version v7.4.11.32428.GP Without Watermark
- Kinemaster Old Version2 years ago
KineMaster Old Versions 7.4.10.32410.GP Without Mark
- Kinemaster without watermark2 years ago
Kinemaster without watermark Download Latest Version 4.15.5.17370.GP
- Best Kinemaster MODs4 months ago
kinemaster pro apk download 2025 full unlocked + no watermark kinemaster mod apk
- Kinemaster Blue Apk2 years ago
Kinemaster Blue Apk Download Without Watermark | Latest Version]

 Blog2 years ago
Export 4K Video Using Kinemaster: 3 Tips for Amazing Results